


WATCH: In and Around Water Ep. 1 Panama
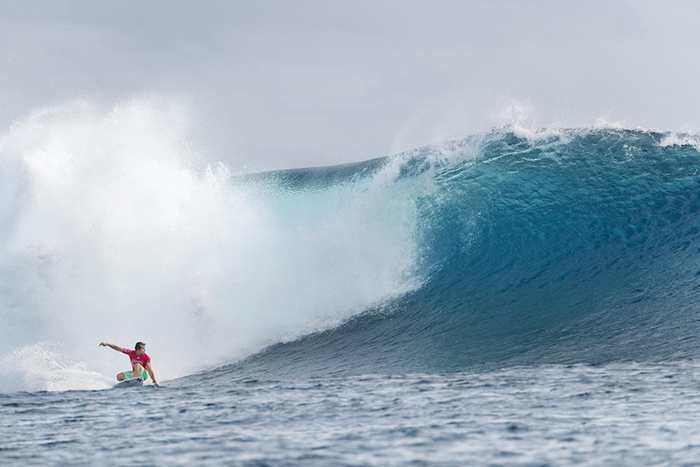
Hurleys first instalment of the new series "In and Around Water". Shot on the coast of the Caribbean island of Panama. Filipe Toledo, Barron Mamiya and Yadin Nicol go blow for blow in draining a-frame set-ups. Lefts, rights, closeouts and drops that only surfers like these guys could make. Read More
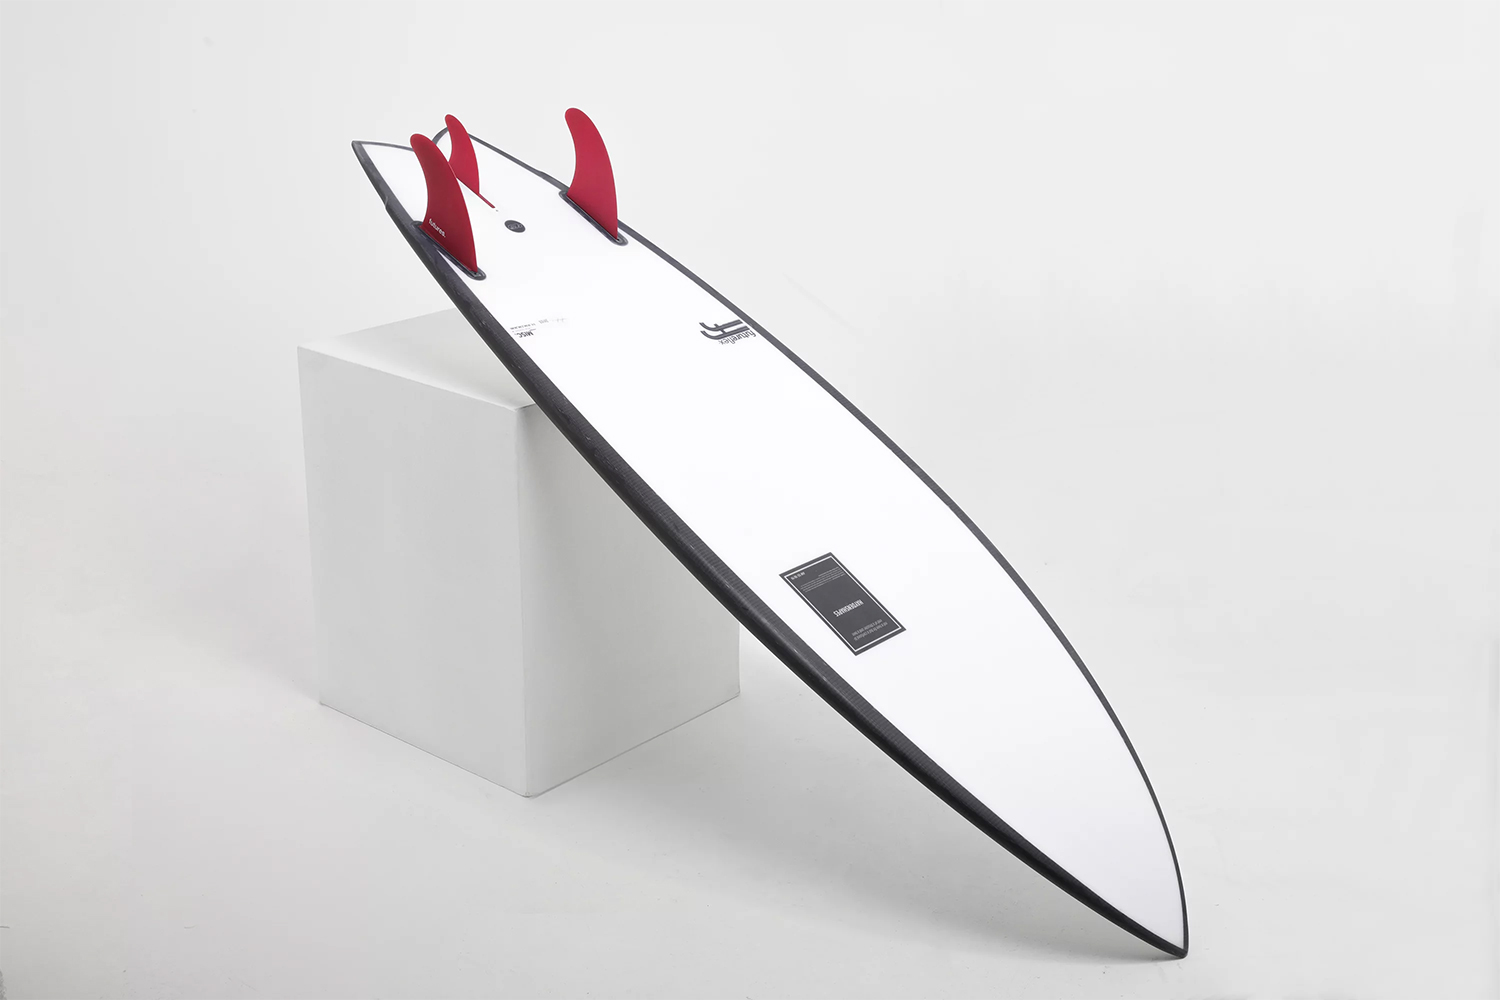
WATCH: Nate Tyler and friends on the MISC
The Haydenshapes Misc is the latest edition to the Haydenshapes range. Super drivey, fast and loose above the lip. The MISC. is a Haydenshapes team-rider favorite for those wanting that elusive performance twin. It'll have you’ll be flying down the line and drawing plenty of speed with that drag-free twin fin feeling.
Click the image below to view the featured MISC by Haydenshapes
WATCH: Colin Moran's debut Octopus Clip
Check out the latest clip from Octopus featuring Colin "Goose" Moran. Colin has been a favorite among the Boardcave team for a while now mainly because of his unique style, in particular the reverse layback/grab hack's he throws at the lip (as seen in the video title image). Could this maneuver be how he was nicknamed "the Goose"? Probably not, but we think it's rad. Enjoy the clip!
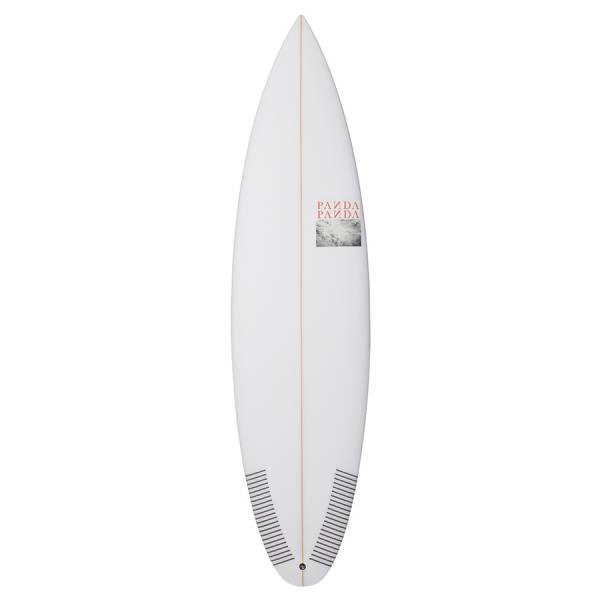
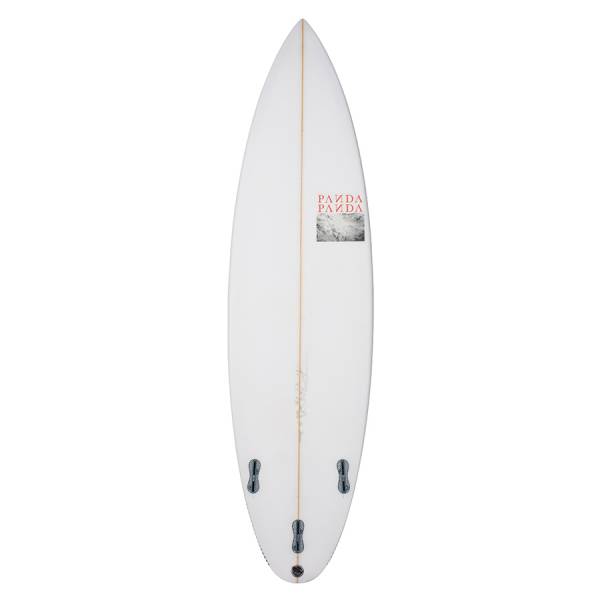
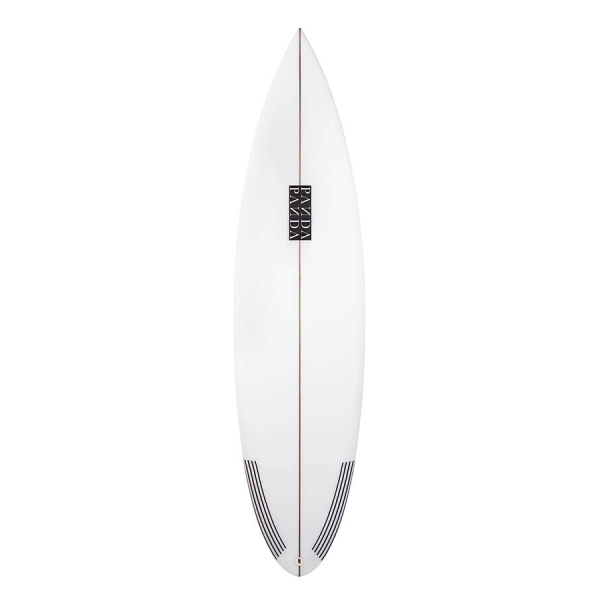
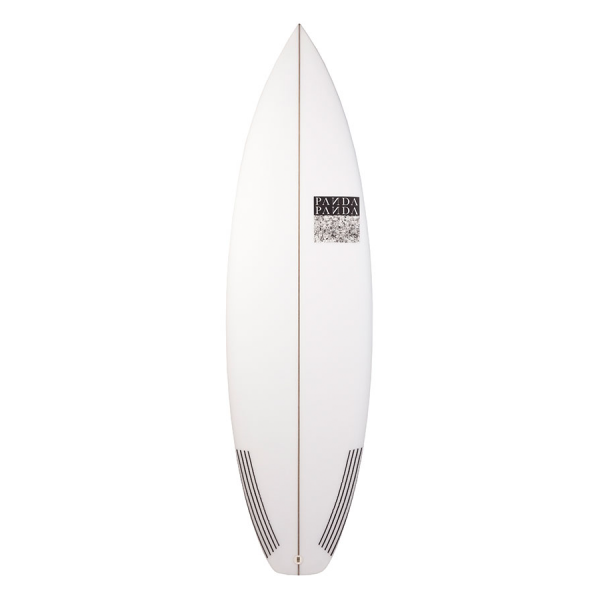
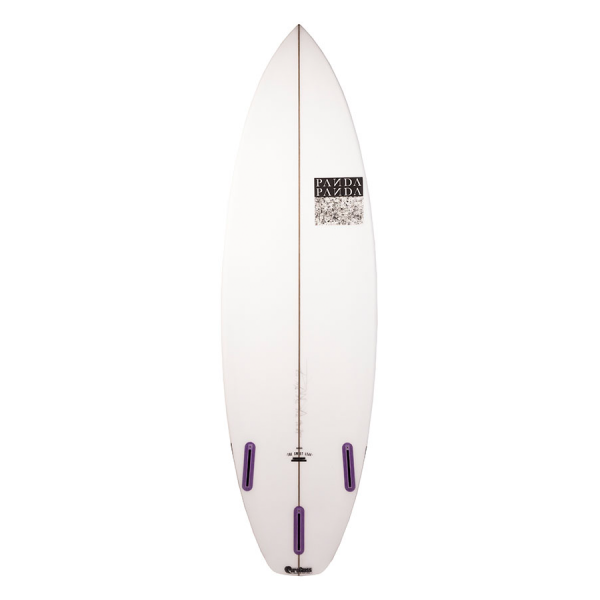
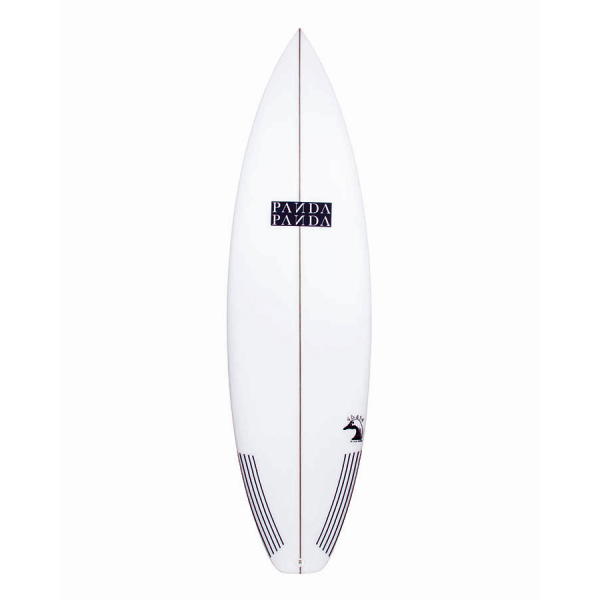
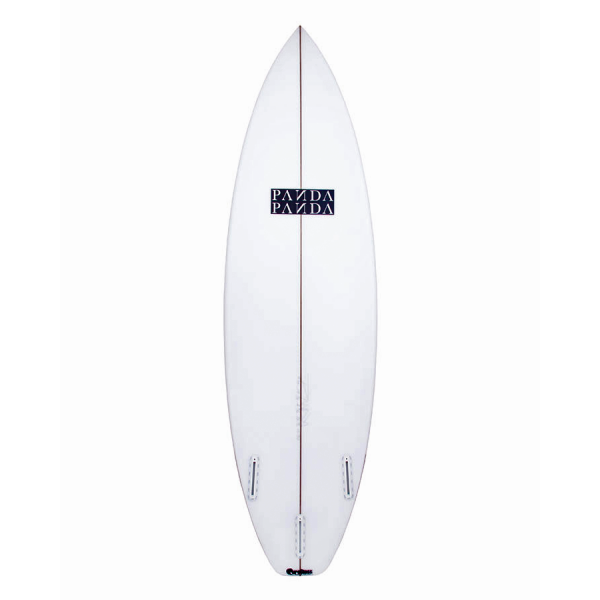
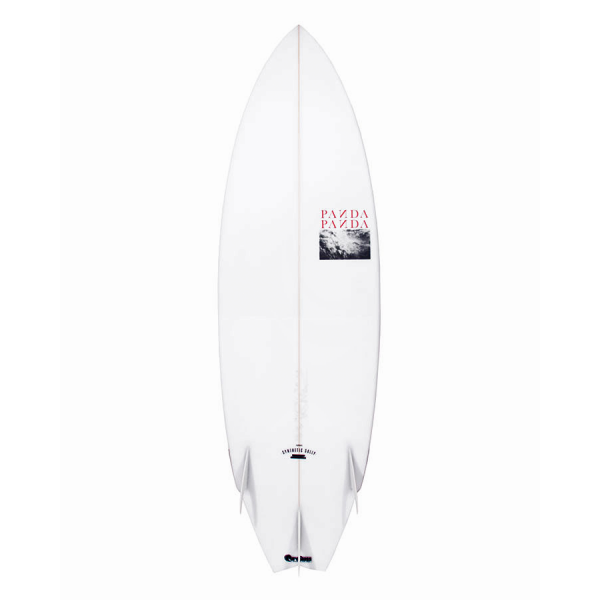
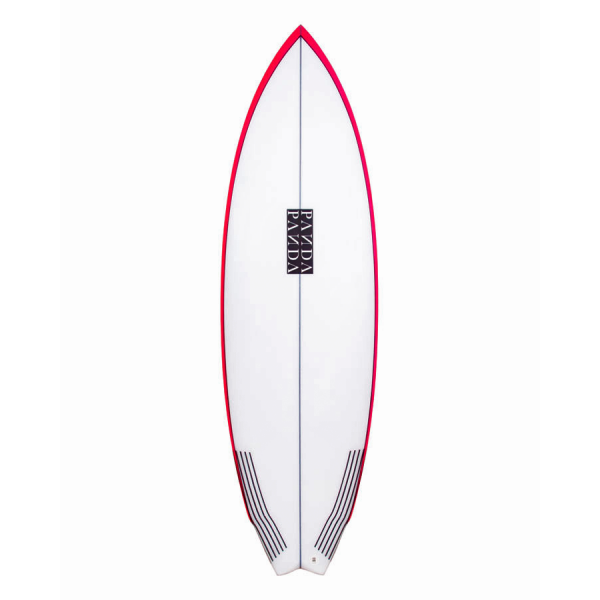
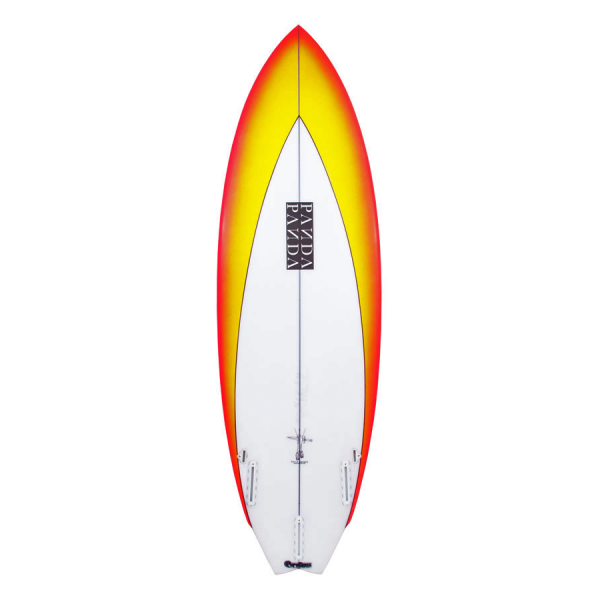
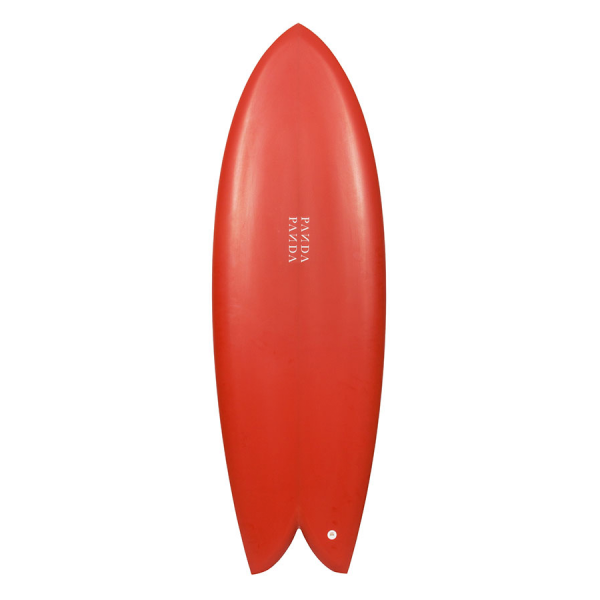
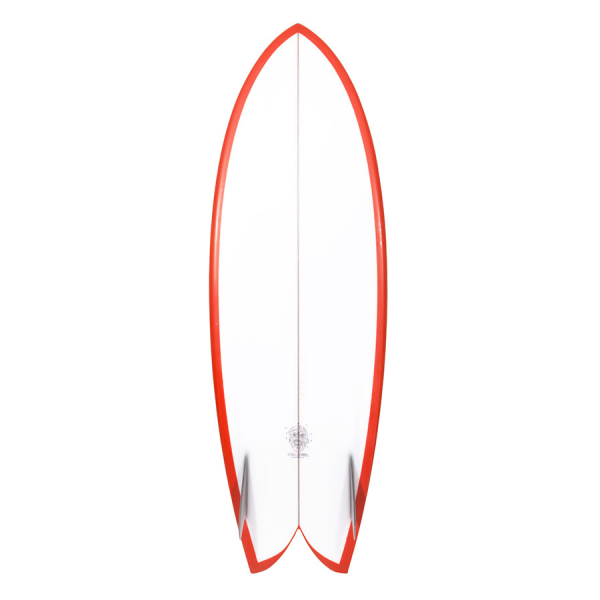
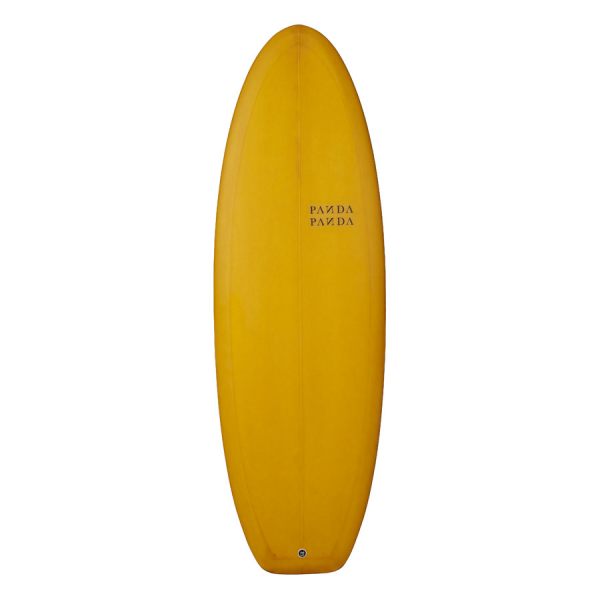
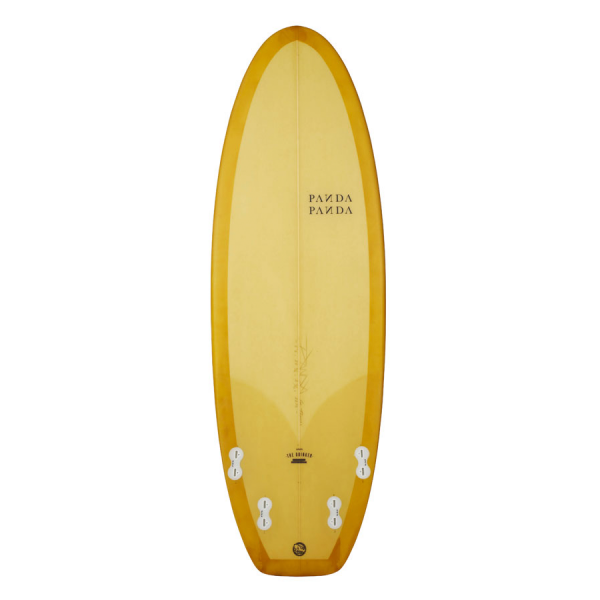
Colin Rides Panda Surfboards check out the range below:


Footage by:
Matt Tromberg
Michael Cukr
Blake Myers
Hunter Martinez
James Kinnaird
Jack Coleman
and possibly some other dudes.
Edited by:
Matt Payne
How to Choose the Right Surfboard
How to select the right surfboard and the factors that affect your board choice. Find out more about surfing and surfboard information at Boardcave.com. Stay in touch with The Surfer's Corner for all the latest surf news and articles. Read More
Thruster Vs Quad Fin
Thruster Vs Quad Fin, What to Ride and When
With a good majority of surfboards coming in the 5 fin convertible option, the question we often get is “which is better, the thruster or the quad?”. Unfortunately, there is no simple answer to this question…simply put, both are great. It all depends on what you need out of them.
This is the main reason why so many boards are offered with the 5 fin option.
Surfboard Fins play a big role in your board's performance. Out of our experience, we would say that almost 40% of your board's performance is due to your fins. Switching out your fins, or your fin configuration, plays a BIG role in how your board is going to want to be surfed.
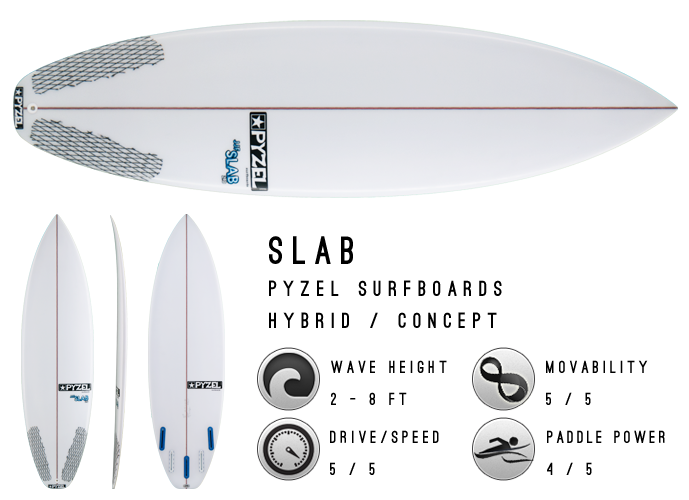
The Slab by Pyzel Surfboards giving you the option for speed and hold or top to bottom shredding.
The matter really goes beyond the simple quad or thruster question. Where your fins are placed in either configuration plays a role as well, which we will touch on throughout the article.
The Single Fin came about to help give big heavy boards some traction and stability. They became refined over time to help produce drive while providing hold. Twin fins came into play to help loosen boards up, giving maneuverability as well as added drive.
Simon Anderson developed the thruster to give him an advantage over the twin fin design as he was a bigger, heavier footed surfer. This may have resulted in a lack of down the line speed compared the the twin fin, but gave him the added element of control while pushing through turns and preventing him from sliding his board out. Through experimentation, he was able to find a good balance of drive and speed with control.
The quad fin pretty much blends attributes of the twin fin and the thruster. That added down-the-line speed without the resistance/drag of the center fin in a thruster, but with more hold and controlled maneuverability than the twin.
The trick with quads though, is the placement of the cluster of fins.
If we take the rears fins into consideration, the closer they are together, and the further they are back, the more your board is going to surf similar to a thruster. The farther apart they are and/or placed higher up near the front fins, the faster down the line they will be like a twin.
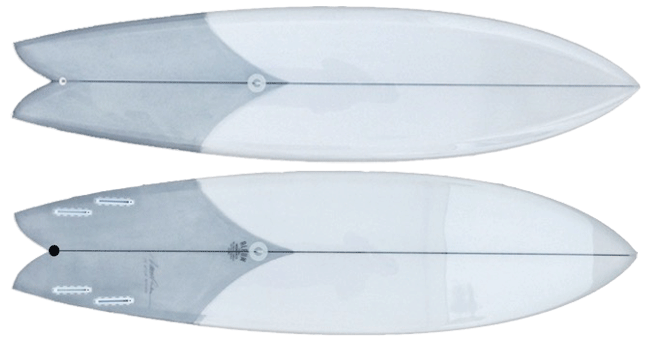
The Cali Quad by Eye Symmetry Surfboards gives you a little extra performance with the rear fins set a touch closer together.
Why Consider a Quad?
You may be thinking to yourself, why even have the quad option? Well, simply put, the quad fills that void where the thruster or the twin fall through. Everyone wants that fast but loose feeling, while maintaining control when surfing. That is exactly where the quad comes into play. And they can be put to use in either big heavy hollow waves, or small mushy gutless waves…depending on the cluster placement.On smaller gutless days, having quad trailer fins closer to the rail and slightly further up, will really loosen the board up for you. This allows for quick maneuvers and sliding the tail around as you need with ease. It also gives you that much more speed through the flats as there is no resistance of a trailing center fin.
For the bigger, hollow days, the quads with rears place back a little and also close to the rail will provide extra speed and hold in the face of the wave. You can take higher lines on steeper waves with the extra hold of having two fins on the rail. Plus that extra speed, again due to no center fin drag, comes in handy on those fright train barreling waves where there is not much room to turn anyways.
To top that off, they are a touch quicker out of the gate compared to your thruster. As soon as you take off and get to your feet, quads will provide you instant down the line speed instead of having to pump and drive your board.
Those were just a couple of examples from one end of the spectrum to the other…changing the fin placement around will adjust how the board wants to be surfed. If you were to bring the rear fins closer together, they are going to begin to act more like a pivot point, similar to a center fin in a thruster set. So thinking about the particular board you are ordering and how you want the fins can be crucial. However you shaper has more than likely already thought about this and it set them accordingly.
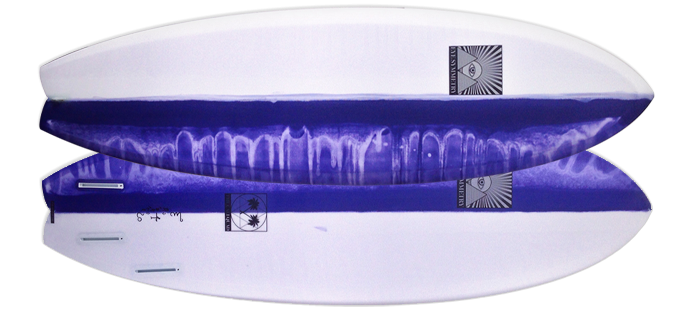
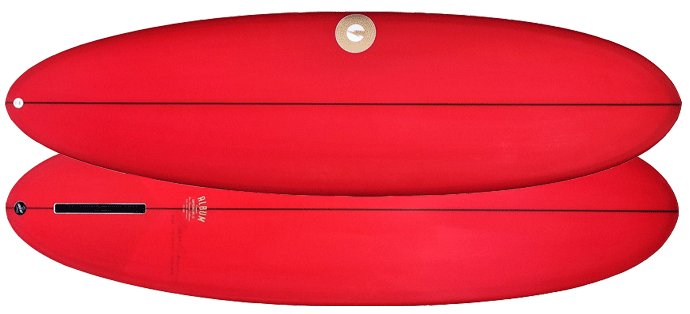
It may look a little fishy, but the Wilderness by Album Surfboards will hold true in super hollow surf. Note the rear fin placement offering maximum hold and speed when set out towards the rail.
So Why Consider a Thruster?
There is a good reason why the Thruster Fin setup has been and still remains the go-to for surfboards over the last 30 years. Simply put, they are predictable, and they work. But if quads are so functional, you might be asking why even consider the thruster anymore?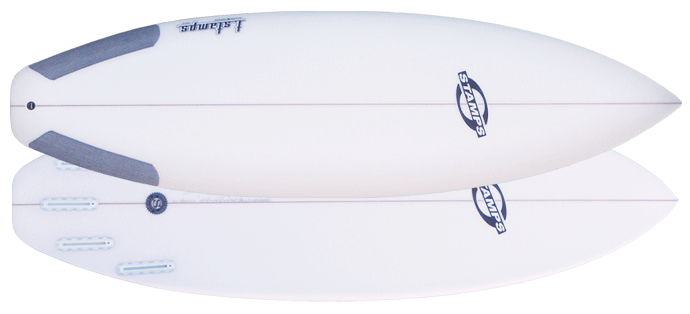
Stamps Surfboards gives you the option with this Grinder X for a loose board that goes fast down the line, or a highly shreddable weapon when the waves need some slicing.
Well, the thruster is perfect for those super ripple days. Where the quad is great in either small waves, or hollow days that are down the line, the thruster gets you what you want when you have time to perform instead of trying to glide past sections or make it down the line with speed.
They give you a controlled drag that comes in useful when wanting to surf at a higher level on good quality waves. And by good quality (for the purpose of this article) we mean waves that are not too fast, not too small or weak, just simply rippable. Think of those shoulder to slightly over head days that are top to bottom, but with lots of room to move around and get in lots of good turns.
Thrusters will still work in small waves, and big waves for that matter too, but it all comes down to the choice of Surfboard Fins with the board, and what the surfer prefers. You see some big wave surfers going quad for that extra speed and ability to hold a high line. Some guys however prefer the extra stability and control needed that the thruster can give you.
What Should You Get For Your Board?
Well, if you can, go with the 5 fin option. Why not have the opportunity to change out your fin set up if you can. That is what surfing is all about after all, experimentation. Having extra fin boxes not in use under your board is not going to make a noticeable different in terms of the drag or confusion of the water flowing through the bottom. So if you can, why not?However, some shapers have designed certain models to work in conjunction with ether a thruster or quad set up but not both. This is rare, but it does happen. Even still, if they will allow you the option to go 5 fin anyways, do it.
Calculate your ideal volume using the Board Engine, below:
Take a look at the Hypto Krypto for example. Hayden Cox designed that board originally to work specifically as a thruster. The shape and bottom contours of the board are supposed to give you enough speed that going quad was not needed. But, by popular demand they recently release the 5 fin Hypto Krypto, option so surfers could experiment. It wasn’t as simple as just dropping in a couple of extra boxes though. Hayden really had to think about the fin placements of both designs and take that into consideration to how they each can be situated while utilizing the same front fin boxes.
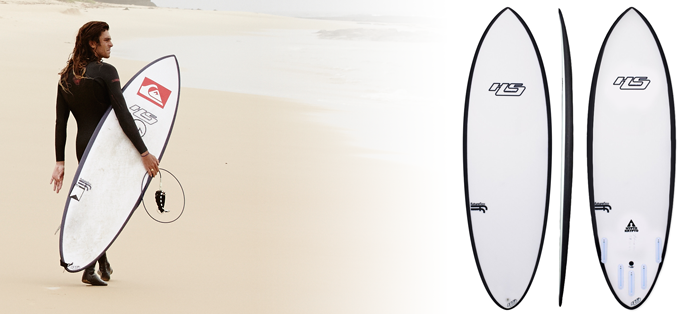
The Hypto Krypto in all it’s 5 fin glory.
So, in a nutshell, if you can get the 5 fin option, go for it. You are not losing out on anything, only gaining. You never know until you try.


Mid Length Surfboards
What to Consider When Looking at a Mid Length Surfboard
So you are thinking of adding a mid length surfboard to your quiver, but where do you start? There has been a big trend lately of more people getting into riding mid length boards, and for good reason.
Mid length surfboards fit right in that slot where:A. You don’t longboard much but want to feel the glide without lugging around a 9’ log, or;
B. You love a Mini Simmons or a fish for smaller days but still need the length that your Simmons or fish can’t give you.
These boards aren’t to be reserved for just small mushy days however.
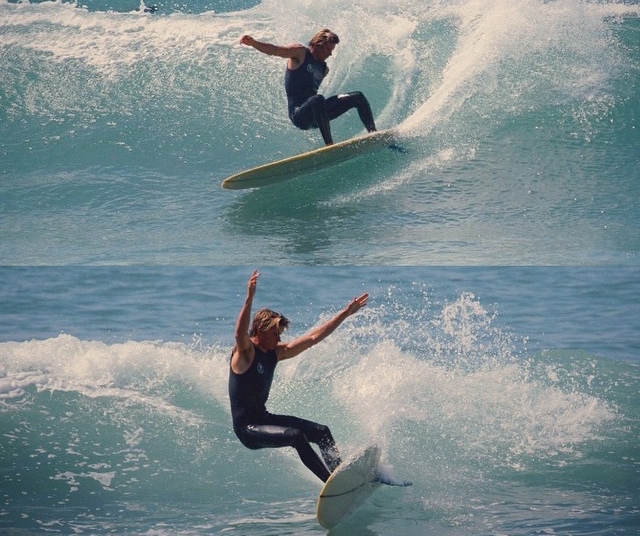
A head and lined up day will give you a sensation your shortboard, fish, mini Simmons and even log can’t beat. That feeling of coming off the bottom, springing back up the face of the wave and sitting perfectly in trim right in the pocket.


A little overhead, Mikey February with a nice slash
Mid Length Surfboard Styles
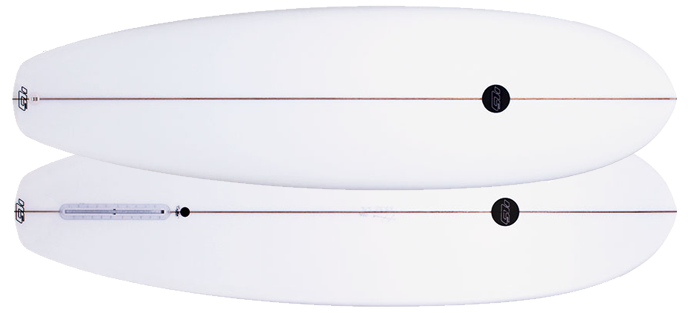
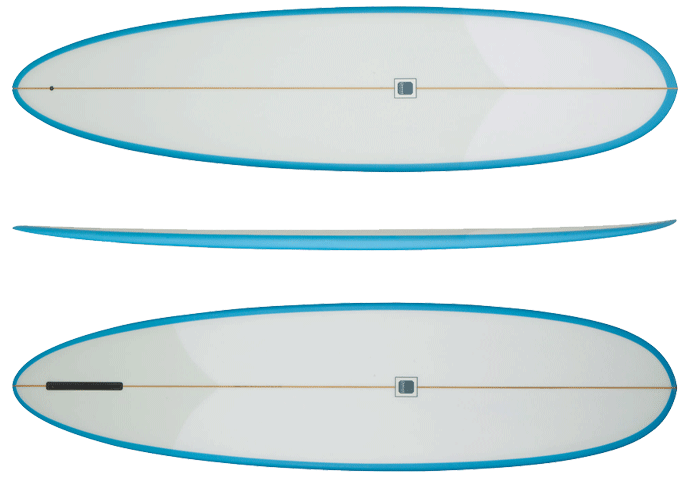
There are a few different styles of mid-lengths you want to consider before pulling the trigger. Depending on what you are looking to get out of one of these boards, each style will offer something different. One style is not necessarily better than another, they are just built for different waves and different styles of surfing.What these boards have in common are the fin setups. They are primarily used as either a single fin or a 2+1 set up…which means a single fin with two stabilizers.
Also their length range.
Mid lengths fall into a size range ranging from about 6’8 or 7’0 to around 8’0. Any shorter and they are really just a short Fun Board style or a Single Fin Surfboard. Any longer and they start falling into the longboard surfboard category. There is no defined size range though, so there is room to move either way.
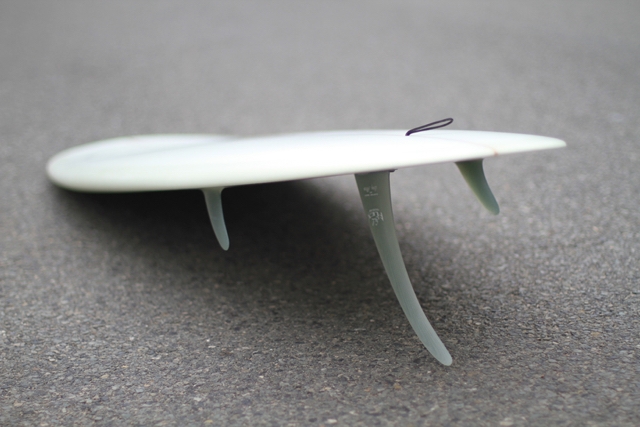
The 2+1 fin set up is a great option for most mid lengths, if you use a removable fin system like FCS or Futures boxes, you have more options.
A couple of the main attributes that commonly differentiate these boards (apart from the fin configuration, single to 2+1) are the bottom contours and the rails. You can lump the bottom contours into two main categories, hull bottom and concave bottoms.
Hull Bottom Mid Lengths
Less forgiving, often frustrating, but nothing like it once you get it dialed in, the Hull bottom boards are essentially boards with no concave to them at all. In fact, their bottoms are convex or Vee bottoms all the way through from nose to tail.This type of mid length wants to feel and surf with the power of the waves as opposed to pumping down the line generating speed.
The hull bottom basically lets the board sit in the water instead of planning on top of it. You don’t pump these boards to generate speed, you just let the board and the wave do the work for you while you just take control of riding up and down the face of the waves.
They sit nicely in the pocket, and when you do want to get out on the face more, or if you see a section coming you want to make it around, you just have to take a high line on the wave and let gravity take control when coming down the face.
Get low, keep your center of gravity tight and let the board glide right past that section until you can park it right in the pocket again.
WARNING: KNOW WHAT YOU’RE DOING. These are generally not good boards for beginners. For beginners we recommend our range of beginner surfboards.
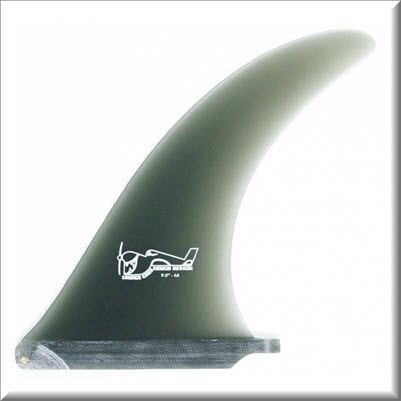
Usually the rails are fairly tapered and the single fin, or fin box, is set father forward and a traditional single fins. They usually get paired up with an ultra flexible fin which helps add to the projection back up the fact of the wave off a bottom turn.
This makes for a board that needs a lot finesse when surfing.
The rails are usually tapered quite thin, but will still be a soft rail with no hard edges. This makes for a rail that releases easily, but being so tapered, it is easier to catch your outside rail when rolling between the rail that is in the face of the wave and the bottom of the board.
This style of mid length really works best in lined up clean waves. A nice point break is ideal, since you need to surf with the wave, the longer the wave the better.
Punchy surf is no fun as the board isn’t designed to snap turns, it wants to be surfed from the middle of the board, run down the line and glide up and down the face with the occasional cutback to get you back to the source of the power.
Concave Mid Lengths
For the purpose of this article, all other mid lengths can be lumped into this category. Apart from the Hull Bottom mid lengths, your reasoning for looking for one of these boards may vary.
You might be feeling a little older, slower and looking for a fun sized board to keep you out these surfing without having to resort to a log. Or maybe you normally ride a thruster, but just simply looking to take new lines without drastically changing the way you need to surf.
The Sano Free by Canvas Surfboards, an easy rider for the beginner, aging surfer or if you're just looking to have fun.
Concaves on any board are designed to get you up on a plane. But this usually requires the surfer to help generate the speed by pumping the board, keeping you up on top of the wave instead of sitting in the wave letting it do all the work. You use the fin or fins a little more here and can surf the board with the rails, rocker and fins in conjunction together.
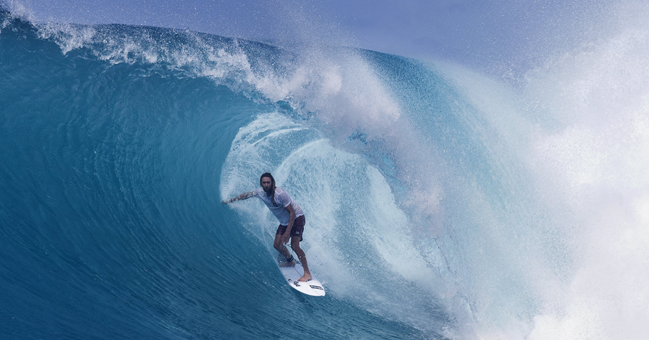
Some of the early versions were really designed for hollow, heavy surf…think Gerry Lopez at Pipe.
Longboards couldn’t really fit that style of wave, so they were getting shorter, wide point pushed forward for ease of paddling, and tails pulled in to hold and fit in a steeper faced heavy wave.
Other’s just simply came about with the “shorter board revolution”. People started chopping their longboards down into smaller craft, again to enhance performance but not necessarily for heavy hollow surf. Think Michael Peterson and crew here, throwing down carves that were never seen before. The 7’0 – 8’0 surfboard was the shortboard of the time. Now it is either a mid length of some sort for average surf or a semi-gun for heavy surf.
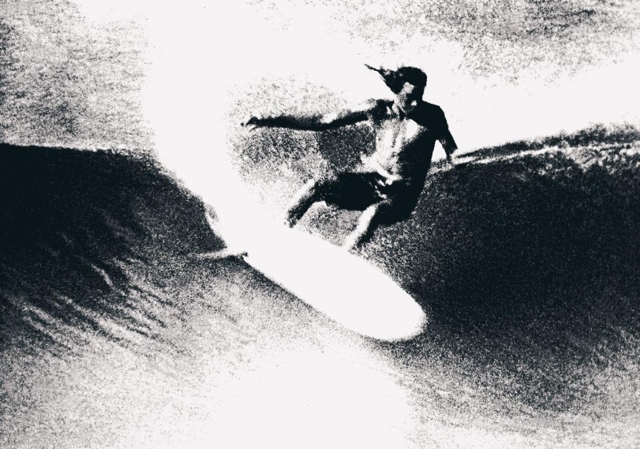
The legendary Michael Peterson on the 70's version of a performance shortboard...now today's mid length.
There are so many styles that can fall into this category, like the single fin egg, mini nose riders, fun boards etc. And all with varying degrees to how they can be surfed and what waves they excel in.
For the most part, they will still be set up as a single fin or a 2+1, but the fins will be a little more upright and stiff compared to what you want on a Hull. This provides more drive and release, giving you much more performance than it’s Hull counterpart. You can snap it off the lip, carved gouging cutbacks, re-entries, etc.
The Disc by Album Surfboards in something like a 6'8" or so, single fin or 2+1 will have you taking new lines and reinvigorating that stoke!
If you looking for an easy board for fun in the sun, look for a fuller template with softer rails. This will give you more stability and is a very forgiving board to surf for most people.
On the other hand if you are planning on surfing this board in good days that may have a bit of punch and some shape, a nice down rail will go a long way. Add in the 2+1 set up and you really have some performance to work with in good conditions.
Whatever You Need
What ever it is you are looking to do, you can find a mid length to do it. You just have to know what to look for and really take into consideration the type of waves you plan on surfing.A Vee’d out bellied Hull Bottom board is not going to work too well in punchy beach break conditions. If you don’t surf points that often, maybe steer clear of this style unless you want one sitting in your garage until you do venture out to the points or waves that are lined up and have some length to them.
On the other hand, the average single concave to Vee out the tail with a 2+1 setup is so versatile you can pretty much surf it anywhere and in most conditions.
There are so many other variables and combinations available, so don’t take this article as the end all and be all for mid length designs. Think about what you need out of a board like this, look around, try a few out or feel free to ask us here at Boardcave for advice and information or plug your details into the Board Engine with a couple of advanced settings and see what you get…
A mid length surfboard can be as unique as the person surfing it, so get out there and have fun with it! View our wide range of Mid Length Surfboards or use the patent pending Board Engine to calculate your ideal volume and quickly locate the boards best suited for you.
Watch the clip below for a rundown on the JS Industries Big Baron.
Selecting the Right Tail Pad
The amount of tail pads out on the market currently is crazy! And with more brands coming out daily, it really gives surfers an awful lot of traction options to choose from. More often than not, when we treat ourselves to a new stick, we instantly become creatures of habit, reverting to the comforts that we know with the attitude of “yeah that will do.” I guess you're reading this and thinking, “well actually I just grab the one I like.” When in-fact there’s more to it. Each pad has its own purpose, and the design of them actually benefits your surfing.
Unlike Surfboard Fins, we don’t have the liberty to change our surfboard tail pads regularly. We’ve compiled a little insight list to give you some clues in what to look for when buying a new grip.
What is a Surfboard Traction Pad?
One of the first things you observe when picking up a surfboard for the first time is that board’s surface is slippery. When it comes to surfing, water and a slippery surfboard aren’t exactly the best combination. To solve this, surfers use two methods for getting better traction: traction pads and wax application.
Surfboard traction pads or surfing grip pads are pieces of foam that are usually placed near the tail area of the board where the rear foot is placed. Surfers generally prefer traction pads over wax because it is a one time install and eliminates the need for constant waxing. These are also perfect for beginners since it gives them a reference point on where they can place their foot, helping them improve their stance in the process.
How to Choose a Surfboard Traction Pad
Selecting a traction pad boils down to two major factors: style and functionality. While style involves personal taste and there is no shortage of designs out there, function requires a little bit of thinking. The best way to shop is to first figure out what you want with your traction board in terms of functionality and then select the best design after.
One or multiple pieces
A single piece traction pad is easier to install but may not be a perfect fit for all surfboards. A two- or three-piece traction pad, on the other hand, allows for better customization. Depending on how specialized your surfboard, you could use multiple traction pads of up to five if need be. While this makes it easy for you to tailor-fit your installation it also has its downsides. These are harder to install and are easier to peel because each piece has a lesser surface area to stick to.
Raised or no raised arch
A raised arch offers you better stability when your surfing style involves a lot of foot slamming on the traction pad. However, it limits your foot’s mobility as the arch may get in the way of smoother transitions as you move your foot around the tail.
High versus low kick
The kick functions like a stop that prevents you from kicking your rear foot off when making turns. Higher kicks are designed for more aggressive surfers. For everyday surfing or those who simply cruise over the waves, 20-degree kicks should do the job.
Using a front deck grip or not
Most surfers can do away with a front deck grip. These certainly look good on a board but if you’re not planning to do massive airs then you can skip this altogether. Front deck grip provides surfers the additional benefit of having their foot planted during big airs giving them better control over their surfboards.
Surfboard traction pad material
Another important thing to check when shopping for traction pads are the materials used for its construction. The type of rubber foam used determines how it reacts to water. Look for something that provides great traction while maintaining its integrity when wet. Today’s traction pads are more capable after undergoing several upgrades since its introduction in the 1970s. These are now made from Thermoformed EVA and available in a variety of shapes, arches, and colors.
Surfboard traction pad styles
Although this is considered as a matter of personal preference and does not have anything to do with a traction pad’s performance, selecting a traction pad that works with your taste makes it personally rewarding. With surfboard grip pads coming in different shapes, styles, and colors finding the perfect traction pad that complements your surfboard is easy.
When Should You Use a Surfboard Tail Pad?
Traction pads are designed for maximum grip and sure beats the trouble of waxing the surfboard every time you have to use it. Surfing traction pads enhance performance and makes surfing more enjoyable. It helps you stand up faster, makes it easier for you to plant your foot, and helps improve your stance.
Surfing traction pads work as an anchor when you're maneuvering the waves or doing turns. These are also ideal for cruising or just standing up on the surfboard. Traction pads are often seen on shortboards. It is because shortboards have a small surface area so it important that you maintain optimum stance. A traction pad can act as a guide for proper foot placement.
There’s just no downside to using surfing grip pads. These are perfect for any surfing condition or any skill level. Anything that gives you better control over your surfboard or helps you maintain proper stance is always a plus for any surfer.
The Four Essential Components to Tail Pads
Kick
The degrees in which the kick in the pad sits, ranges anywhere between a mellow 20 degrees right up to vertical and steep kicks. The steeper the kick, the easier it is to jam your back foot in place to blow the back of the wave out. If its vertical and performance surfing you like, a kick between 45 degrees to vertical is perfect for your needs. If it’s a pad you need for a fish/retro board, a mellow flat tail pad is your answer.
Arch
The amount of difference in arch design alone is incredibly broad. However, it all comes down to the size of your foot and how much movement you like to have. If you’ve got smaller feet, a pad with a small to minimal arch would be best. However if you’ve got a big foot, then look for something with a longer higher arch that nearly runs the length of the tail pad.
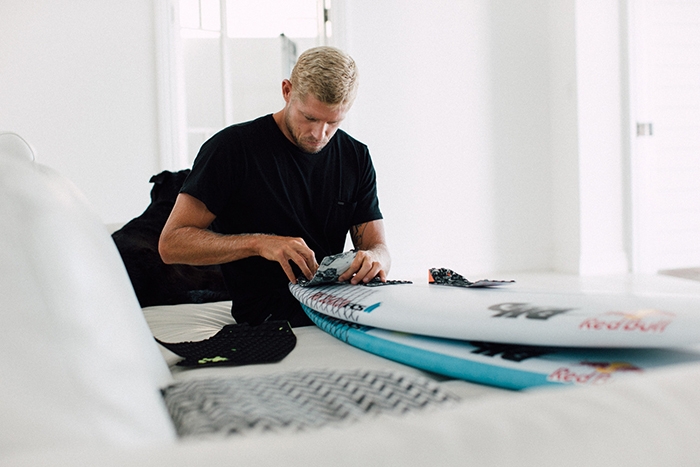
Mick carefully applying a tail pad to his DHD surfboard.
Number of Pieces
From one piece to five pieces, they’re designed to effectively be usable on most boards.
- One piece pads aren’t as common nowadays as they were a good 10+ years ago, however they have made a come back recently for their durability.
- For a while the two piece pads were seen as the weird uncle to the three pieces. Featuring no arch and a mellow kick, these pads are great if your throwing something down on the rear of your fish.
- 3 pieces are the most common grips, allowing for an even spread of grip and versatility for all board models.
- 5 pieces are effectively the 3 piece grip but with two tabs that sit above the main area of the tail pad adding extra grip in bigger swell.
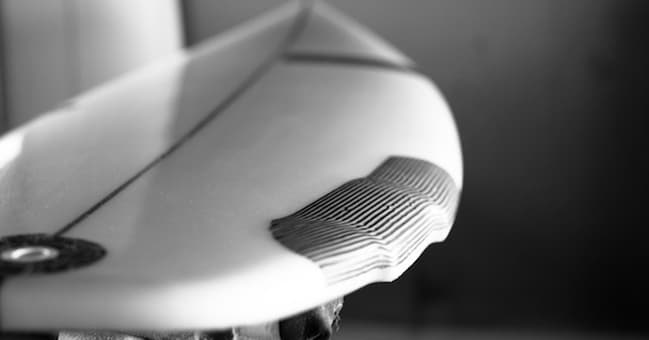
Traction
The grooves themselves are more often than not shaped like diamonds and some feature multi layered grooves while others feature a single layer groove. Circular designed traction are also starting to make an appearance amongst some manufactures. However, the basic rule of thumb is the rougher the grooves, the greater the traction. This provides maximum resistance against slipping and maximum grip, but will still allow you to move your foot about when needed.
A single layer groove generally is a straightforward design that allows both grip and movement. A multi layered groove looks like a diamond with another diamond on top. These are the grippiest of the grippy. Once your foot is down it isn’t moving anytime soon. And if it does, it’s against its own free will.
So What’s The Best Tail Pad For Me?
More often than not, it’s personal preference of what works best for you. However, consider the board you want to apply it to as the basis for your decision.
How many pieces do I need?
- Does the kick have a high enough support or do I need to change to something with less kick?
- Consider the arch and how your foot would relate to it.
- What kind of waves are you looking to use your board in?
- Do you need something with ultimate traction or something that lets you shift around freely?
- Thoroughly clean the surfboard’s surface. Remove any wax, residues, or any impurities.
- Measure twice cut once. No cutting necessary but this tip still applies here. Carefully measure where you would like to position each piece and mark this.
- Remove the adhesive cover and gently stick it on the surfboard starting from one end going to the other. Applying pressure while doing this to remove any air bubbles.
- Let the traction pad sit for at least a day before using it. This can also be referred to as ‘curing time.’ This gives the traction pad’s adhesive enough time to properly settle with the board's surface.
Once you’ve answered these questions, apply the pad and you're good to go. Just remember you don’t want to be playing around with them too much or you’ll lose your sticky adhesive. The unfortunate thing is once its been stuck on your board, leave it. We’ve seen surfers try use the old hair dryer and paint scraper trick to remove it but in all honesty, if you must through that much trouble to remove the tail pad, it could be time for a new board!
Installing a Traction Pad on your Surfboard
How long and how well your traction pad sticks on your surfboard depends on how well it is installed. Below are the steps on how to professionally install your surfboard grip pad:
Surfboard Traction Pads – Good or Bad Idea
Are traction pads a good idea? The short answer is Yes! Traction pads give you grip hence, better control over your surfboard. Anything that enhances your performance is definitely a plus in anyone’s book. It makes turns easier and saves you from the trouble of constantly waxing your surfboard every time you use them. In contrast, if you're more focused on the price aspect, opting for surf wax can be a cost-effective alternative to traction pads.


Surfboard Tails Rails and Noses
Surfboard Shapes - How noses, rails and tails effect your surfing performance
There are plenty of factors including your own performance that help determine how a board will perform. Some of the biggest factors, however, are directly related to the outline of the surfboard or surf board shape. The Nose, Rails and Tails and how they are linked together are massive in creating a good board.
While individually these elements are going to give you certain outcomes, it's how they relate to each other in combination that's really going to make a magic board or a dud.
The Nose
When it comes to determining surfboard shapes, the first third of your board is known as the nose. When we talk about nose width, we take that measurement from 12 inches down from the tip.
The shape of the nose is a key element in how the board paddles and catches waves. The wider or rounder the shape of the nose the more buoyant it is and therefore, the higher the front of your board will be in the water while you're paddling. This is due to the increased surface area in the front.
This extra surface area works really well on small wave grovelers, long boards and mid length boards that help you get onto smaller/softer waves, and help to provide stability.
The other end of the spectrum is the pointier, narrower nose that’s more commonly found on higher performance boards.
Surf board shapes with a narrower nose won't help as much when paddling into waves – apart from when taking a late drop – it’s definitely going to help you with your performance surfing. With a pointier nose, you will get more curve in the overall rail line of your surfboard which helps you to fit into the pocket of hollower waves and helps stop you from pearling (when your nose sticks into the water) when coming out of big turns.
Duck diving is also easier with a pointier nose due to the less volume.
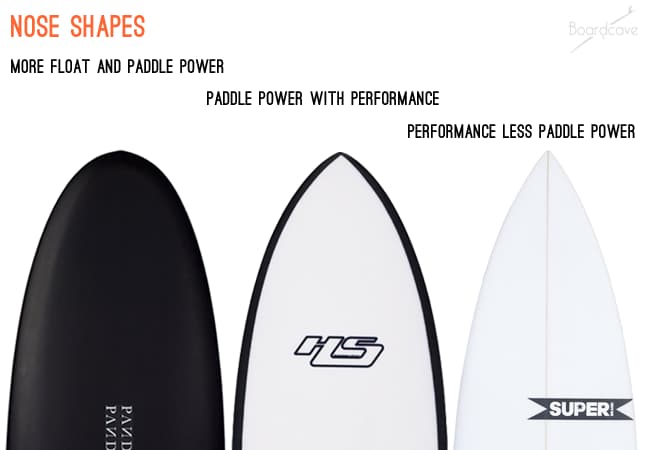
From left to right: the Panda Doinker Egg, the Hypto Krypto by Haydenshapes and the Mad Cat by SUPERBrand showing how different nose shapes effect performance.
The Rails
Since they span the length of the board (from the very top to the bottom), rails are another key part of surfboards and their performance.
There are many descriptive terms for rails, as well as an unlimited number of ways that they can be blended.
But basically, surfboard shapes are going to have either a Soft Rail or a Hard Rail. These can then also be either full or tapered.
This means you can end up with a ‘full soft rail’ a ‘tapered soft rail’ or a ‘full hard rail’ or a ‘tapered hard rail.’

Canvas Surfboards' Ryan Engle working on some rails.
Surf board shapes with Soft Rails are going to perform better in smaller gutless surf conditions and on longboards, mid-range boards and blended into fish and some small wave grovelers. Usually a rounder, fuller rail with different foils.
Hard Rails, which are more commonly found on higher performance boards, have a more defined edge at a certain point around the curve of the rail towards the underside of the board.
This helps the rail to bite into the wave face and give you more hold in critical surf and helps you respond better through turns.
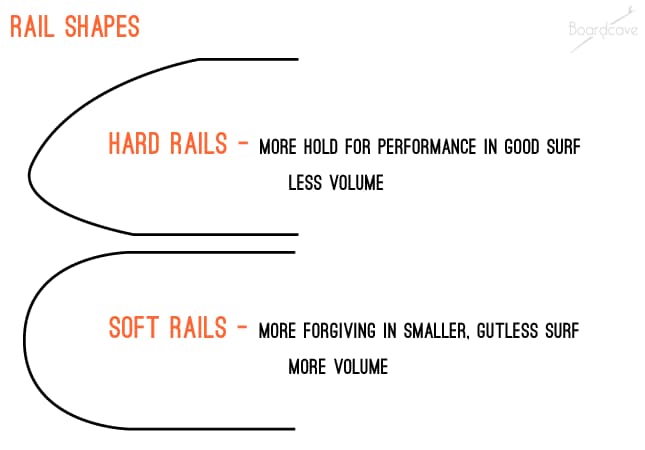
Surfboard shapes: Hard rails vs soft rails
Whether you have a hard rail or a soft rail, the more full the rail is, the more buoyancy you will get, which relates to drive and projection when coming out of turns, as well as how stable the board feels and how easy it is to paddle.
With a more tapered rail, you are able to sink it into the water more easily, which gives you a nice quick feeling coming into turns as well as surfing rail to rail. You may find though, that these rails will lack drive coming out of turns.
The tapered rails are generally less forgiving, especially when you accidentally dip your rail into the wave when you didn't mean to.
The Rail Foil
The general foil of your rail will make a difference in performance. The exact foil of your rail can be different depending on surf board shapes, however there are a few trusted foils generally used, which are 50/50, 60/40 and 80/20. This relates to where the apex of the rail is around the curve.
1. 50/50 foil is found in more soft rail options and traditionally on longboards.
2. 60/40 rail is going to be turned down with the apex slightly under the middle of the curve of the rail. This type of rail can be blended into both soft and hard rails and is also a great option on smaller wave grovelers, fish and Fun Board options. They generally give you a good blend of maneuverability and stability.
3. 80/20 rail is when the apex is even closer to the bottom of the board. This type of rail is generally found on surfboard shapes that incorporate a hard rail closer to the tail. These are made for easy maneuvering and rail to rail surfing as well as performance through turns.

Different foils help your rail bite into the wave for better performance.
These are just some general types of rails and there are plenty of variations for each board and throughout the length of the rail of the board depending on the intentions of the shaper. The shaper also has to consider the overall length of the rail line in the water as well.
With a longer, straighter rail line you are going to get more speed in a straight line, whereas when you have a curved rail, you will increase maneuverability.
It is finding the happy balance of all these factors in surf board shapes that makes shaping the rail one of the most crucial elements in the shaping process.
The Tail
Finally, rounding out the end of the article, and the board, is the tail of your surfboard.
As with everything else, the exact size, shape and volume of the tail is essentially endless. But let's look at some of the basic fundamentals shapers will follow in most tails.

Different tail shapes from DHD Surfboards, from top down: the Joyride, the Twin Fin and the Pocket Knife.
Wider tails offer more stability and float, and will give you a faster planing speed. Narrower tails are going to make rolling from rail to rail a little easier, and can also help with your hold on a steeper faced wave.
Surfboard shapes with a tail that has rounder angles or no angles, is going to help you ‘hold’ the water for a little longer. This will translate into more control of the board.
When you get harder angles in the tail, more water will “release” and give you a looser, more snappy feel to the board. A rounder tail is better for a more open face wave with a little more size and carving potential.
In more punchy, shorter waves, a harder angled tail will help you get as many snaps as possible.
Common Tail Types
Basically there are around 5 or 6 tail categories with an unlimited amount of variations in each, with some being blended together.
Surf board shapes mainly come with tails of these types: the squash tail, the square tail, the pin tail, the round tail, the swallow tail, and the asymmetric tail.
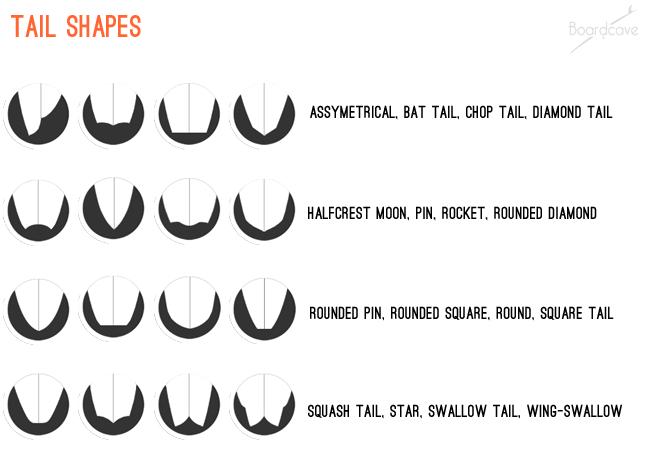
Just a few of the common tail shape types - there are also
variations on each of these.
1. Squash Tail - is the most common found on surfboards. With a squarer back end with rounded corners, you get the snappy feel of a hard-cornered square tail blended with a little more hold and release of water. They also give you that extra width which helps with slower sections of the wave.
2. Square tail - is similar in principle but with harder corners giving you a skatier feel with extra release. Great for down the line speed in smaller conditions, the hard corners act as a pivot point for turning the board. The square tail is a more traditional tail type that is less common these days as the squash tail gives a similar feel with more to it.
3. Round Tail - for slightly bigger days with open faces, surfboard shapes with round tails are a great option. With a continuous curve to help your hold on the water, you can gain more control on bigger, more hollow surf.
The round tail is a great option for open face carving with plenty of width to give more lift when outside of the critical section of a wave.
4. Pin tail - is a staple among many step-up options and guns, where you may find yourself in the barrel or powering down the line in steeper, bigger waves. With less turning ability needed, these boards give you plenty of hold in bigger, more hollow surf.
5. Swallow Tail – gives you a wider tail for increased planing speed, the swallow tail is a great small wave board option. Don’t count this option out when it is barreling though, it also gives you hold in steeper waves (like two pin tails) and can be a blast in steeper faced waves. Also, a ton of fun when turning on the rail. It is, however, harder to transition from rail to rail when trying to bust turns after turn.
6. Asymmetrical tail - occurs when your board has one side with a longer rail line and different shape to the other side. The idea behind the asymmetrical tail is to give you different performance dedicated to your toe side and your heel side separately.
This makes sense as you can’t perform the same way when surfing front side (toe) to backside (heel). Asymmetrical surfboards have many characteristics to them, however, looking at the tail is definitely the most obvious feature.
Your entire rail line, your foil, as well as the nose...essentially every factor of one side of the board over the other needs to be looked at for the difference in front side to back side surfing. Check out the asymmetrical tail shapes by Album Surfboards' models Fascination and the Disasym or review our Guide to Asymmetrical Surfboards.
For more information on the variety of tails out there, see Surfboard Tail Shapes.
The Fins
Fins come in a variety of shapes, sizes, materials, and setups. This plays a huge role in your surfboard’s behavior regardless if you’re a beginner or pro. Fins give you control, stability, and direction. Configurations range from 1 to 5 fin setups. With single, twin, and thrusters as the most common fin configurations.
1. Single fins – this is commonly found in longboards and ideal for basic, fast, and straight shot surfing. Single fins give you better control and paired with longboards is ideal for beginners. It produces lesser drag compared to multiple fin setups. Depending on its tail placement, moving them forward gives you a looser feel or placing them further back allows for more control.
To learn more about placement and size of single fins, read our Longboard Fin Guide.
2. Twin fins – makes your boards feel more responsive and can usually be found in shortboards. They offer more maneuverability and allow you to skate over water. Twin fins offer better control compared to longboards especially during tight turns. When partnered with a shortboard, they also offer better speeds.
3. Thruster/Tri fin – probably the most popular fin setup, the tri-fin is perfect for surfers of all levels. The third fin provides additional stability and maneuverability. The two outer fins are located near the center of the board and angled towards the board’s center for better speed and tracking. View our selection of Thruster fins on sale.
4. Quad fin – this combines the best features of twin fins and thrusters. It offers better control and is best for small surf conditions. It offers more speed in small surf by directing water to the end of the board and out the tail for better acceleration. Similar to dual fins, they are perfect for making fast turns with the added benefit of having better control. View our selection of Quad Fins on sale.
5. 5 fin – is a surfboard board setup that allows flexibility in terms of how you could use fins. However, this does not mean that you could use 5 fins simultaneously. The surfboard comes with 5 fin boxes (insertion point for fins) giving you the option of switching from a two fin, thruster, or quad fin setup. View our selection of 5 Fins on sale.
To learn more about what fins would be best for you, check out The Definitive Surfboard Fin Guide.
Difference between surfboard shapes
Surf board shapes, including the nose shape, tail shape, and surfboard outline plays is a critical factor in determining how your board performs. There are dozens of nose, tails, length, width, and foil combinations that can be used depending on your personal preference.
Longboards – maybe one of the most iconic surfboard shapes. These boards are ideal for beginners because they offer better stability, easy to paddle, and can be used for small waves. Longboards are usually 4 to 11 feet long, have a round nose with a rounded tail pin tail or square tail.
Aside from giving you a larger surface area upfront, a round nose makes it easier to paddle into the waves and glide. It also helps you get into smaller, slower waves more easily. Square tails, on the other hand, enables you to make quick, sharp turns and can be found in high-performance surfboards.
- Surfer level – beginners to advanced
- Ideal conditions – very small waves, provides smooth rides even in poor surf conditions
Shortboards – became popular during the 70’s and highly recommended for intermediate to advanced surfers. These surfboards are made to give surfers maximum maneuverability. Shortboards feature a pointed nose and square/swallow/round tail.
A pointed nose reduces a surfboard’s lift and buoyancy. It also reduces paddling speed making it difficult to catch waves. On a positive note, it increases the surfboard's curve and the overall rail-line which increases its grip on steep wave faces. A pointed nose makes it easier to perform a duck dive and enables your nose to pop out of the water faster.
Square tails are generally good performers on most types of waves and enable you to make quick, sharp turns. Shortboards with a swallow tail work best on smaller waves. The ‘v’ cut tail shape forms two small tails which gives added ‘bite’ when weaving in and out of turns. Round tails are best for making turns with their smaller surface area making them the most maneuverable among the three.
- Surfer level – intermediate to advanced
- Ideal conditions – clean in medium-sized to big waves
Stand up paddle boards – a recent and popular addition to the family of surfboards, these surf board shapes can be enjoyed over a lake, river, or the ocean. This surfboard makes it easy for anyone to stand, hence, its name. Stand up paddle boards come with a round nose and a square tail. The round nose gives the board its lift making it easier to stand up the board. The square tail makes it possible to make quick, sharp turns.
- Surfer level – intermediate to advanced
- Ideal conditions – small and mushy waves to head high surf
Fish – also referred to as swallow tail surfboards are designed for intermediate to advanced surfers looking to maximize turns on small to medium sized waves. Their pointed nose is perfect for making sharp turns while their swallow tail enables them to generate speed over small waves.
The choice of what surfboard tail best works for you still depends on your current skill level and surf conditions.
- Surfer level – intermediate to advanced
- Ideal conditions - small to medium waves
What surfboard shapes are best for you?
There is no ‘perfect surfboard.’
In your journey from beginner to becoming an intermediate or advanced surfer, one of the things you realize is the importance of using the right equipment for certain wave conditions. To maximize your surfing experience, it is not the surfer who dictates which surfboard to use but the surf conditions.
When you start learning about the different surf board shapes, you come to understand that it’s all about finding the perfect balance between the different components to achieve a desired result. For example, when you increase volume (longboards) you improve stability but suffer from poor maneuverability.
Basically, all these features are interrelated when it comes to surfboard design.
Every surfboard model has a different blend of these factors and there are plenty of combinations to try out. The balance and interaction between each element is going to determine how your surfboard will perform.
While there are some tried and true design elements that can be commonly found in surfboards, it is the experimenting with different blends that bring about new developments and keeps surfing fun.
Have a look at a range of surfboards or use the Board Engine to find a combination that will work best for you and don't forget to keep trying new things.
Once you have chosen your dream board, complete your surfing experience with top-notch accessories like surfboard racks, surfboard repair kits, surfboard bags, surfboard traction pads, surf leashes and surf ears. Elevate your surfing game and be fully equipped for every surf session with high-quality surfing essentials.
There's much more that goes into performance and surfboard shapes. Check out our related articles that can help you understand the ins and outs to get you surfing your perfect board:
- Surfboard Construction Types
- PU vs EPS: Which is Best?
- Surfboard Bottom Contours
Are you surfing the wrong board?
How surfboard volume is changing the industry and what you can learn. Get the most out of Surfboard volume calculators and surfboard charts. Read More
What to know about glassing a surfboard
Surfboard glassing and the fiberglass skin that surrounds the foam can impact the board's durability and the way it rides. We touch on the critical aspects of glassing a surfboard to help you decide what you need on your custom board. Read More
Surfboard Bottom Contours
How bottom contours affect your surfboard
The bottom contours of your surfboard and how they are blended together, play a big role in how that board is going to perform. The idea of using different bottom contours is to produce somewhat of a controlled lift and drag effect, playing in to how and why a board will interact with the wave.
Just to keep things simple for now, we will focus on the three main categories that your bottom contours will fall into; Flats, Concaves and Convex’s. All boards incorporate at least one of these, more than likely blending them with the others to help dictate how your board is intended to perform.
Once you establish what kind of bottom you are looking for, you can use the Board Engine to then compare similar surfboards to find the one that suits you best.
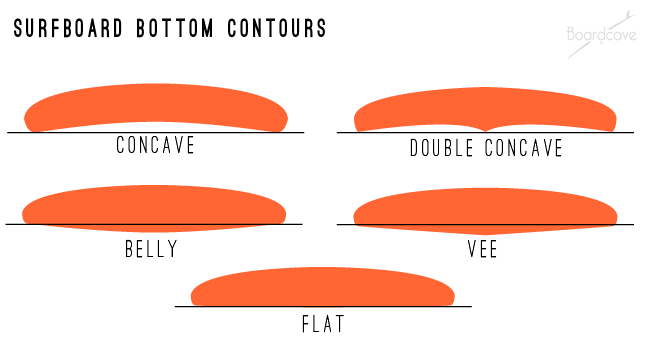
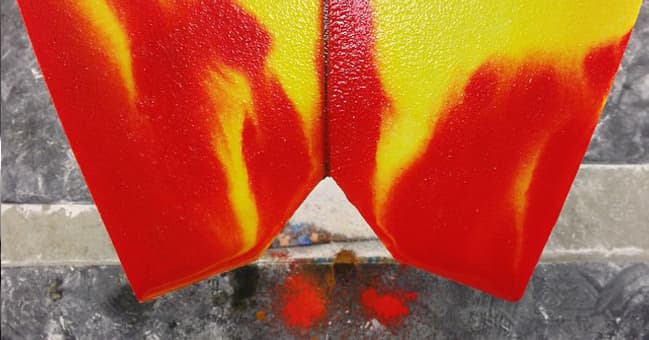
The different surfboard bottom contours.
Any part of the bottom that lifts above the rail line is a concave. Any part that dips below the rail line is a vee or belly convex and flats stay around the same level as the rails.
Flats
Simply put, flats are just the flat sections of the bottom of your board.
Generally, flats are fast but they do not offer much in terms of adding to performance except speed. They plain on the water, but they do not provide added lift, and they don’t contribute to directing water flow or providing leverage when performing maneuvers.
They are often blending with concaves and convexes and are place strategically along the bottom of your board, giving you a section of your board that you can use for pure planing speed down the line.
Concaves
Concaves are the areas on the bottom that rise above the rail line.
Concave’s produce lift as well as laminar flow of the water under your board. They also slightly increase the overall surface area compared to a flat section, and can help get your rail to “bite” on the waves face.
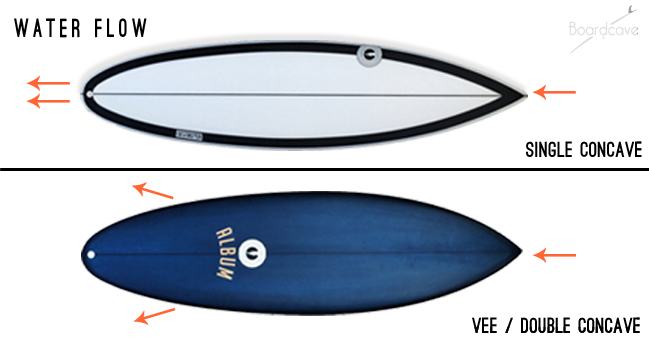
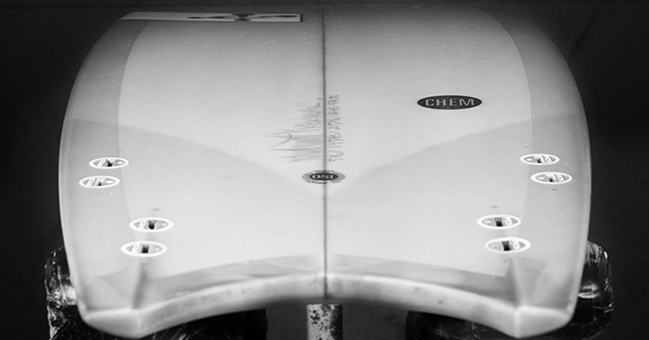
The direct front to back flow of water in a single concave increases your speed, as seen in the Album Surfboards model, the Destroyer (top). Alternatively, go for the controlled release of water flow out the sides with single to double concave, as found in the Album Surfboards Polyphonic model.
There are a number of different concaves. Single concave, double concave, tear-drop or spoon like concave (found on many nose rider longboards) to name a few.
They all produce lift and direct the flow of water under your board, allowing you to sit more on top of the wave. With a nice down rail, you can have lots of control on good days, helping to keep the rail in the water.
Convex Contours
Convex contours, on the other hand, are any part of the bottom of your board that sits lower into the water than your rail.
Found on a lot of longboards, displacement hulls and sometimes hybrids, these help the the transition from rail to rail, and can provide some forgiving stability depending on the board.
Depending on the board, you may see convexes as: a smooth, rolled “belly”; hard angled Vee; or in various degrees of the two.
The rolled “belly” can be seen on a lot of longboards, and blending into some hybrid style shapes. It’s generally found around the nose and running down the length of the board until it is blended into another contour. This can help keep the rails of your nose above the water line, preventing you from pearling…which is especially handy when doing out of some turns.
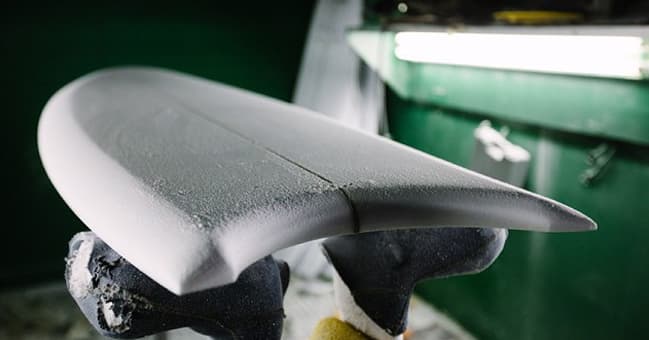
Vees are usually found around the tail of any style of board, and help with control off your back foot, as well as assisting your rail to rail transition from the tail.
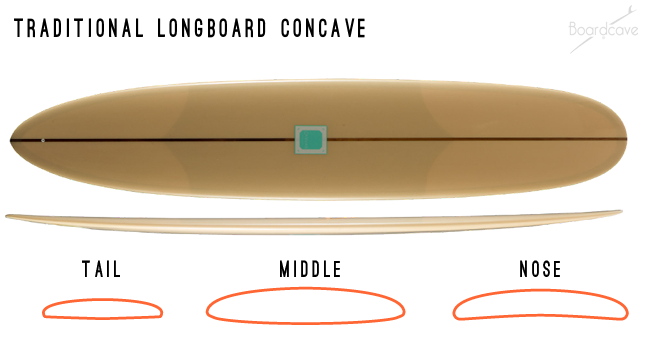
The traditional longboard belly contour in the front, middle and tail shown on the Canvas Surfboards Pinata.
Blending your bottom contours
The way your board is going to interact with the wave is going to be partly due to how these concave are blended together.
We will take a look a three basic examples of common combinations that you will find. Note, there are endless combinations and no one way is the “right” way; these are just examples.
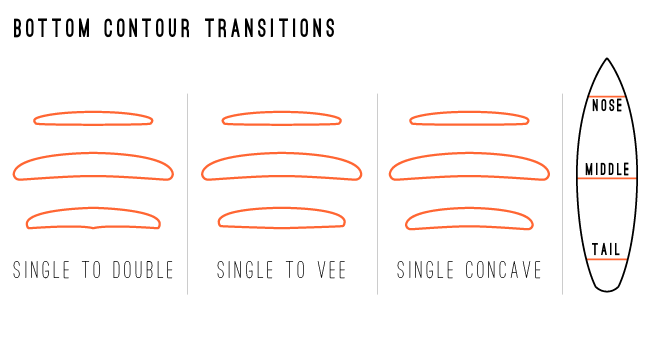
Some single concave transitions into doubles and vees.
Performance Shortboards
In many high performance shortboards, you may commonly find a somewhat flat section running through he nose, which many then blend into a deep single concave through he center of the board. This ay then blend into a double concave starting right around your fins, combined with a little Vee right off the end of your tail.
The flat section will help while your paddling into the wave, it gives you an even surface to plane on when lying down on your board and trying to paddle as fast as you can.
The single concave will help produce lift while you are up on your feet and riding the wave. It will also initially help set your rail into the face. This gives you both control and lift, keeping you on top of the wave while surfing.
The double concave around your fins will redirect the flow of water through your tail and around your fins. This also helps create some lift and control when you are surfing off your back foot. Blending into the Vee right out the back of the board will add to your control and allow you to snap from rail to rail a little easier.
Hybrids
In something like a hybrid shape surfboard, you might have a little “belly” in the nose, blending to a single concave in the middle of your board, blending to flat to Vee in the tail.
The “belly” around your nose is going to displace the water while you are paddling into a wave, or when you are re-entering coming out of a turn. This helps keep the nose from pearling (going under the water) and is used on a lot of flat rocker boards.
The single concave, again, will produce lift and help generate the speed needed when up and flying down the line. Blending into the flat to Vee out the tail, where the flat will help keep your speed up and the Vee will make it a little easier to quickly transfer from rail to rail. Perfect combo for smaller days when you still want to rip.
Nose-riders
Last, we will look at a traditional nose riding longboard. In this style of board you may find tear drop shaped concave in the nose area of the board, blending to a nice rolled “belly” through the center and then Vee out the tail.
The tear drop concave in the nose will help create lift when you are perched up at the nose, as well as help with your control as it will allow you to use your rail a little easier when surfing the from this part of the board. The “belly” through the center of the board help give you some stability, and help provide smooth transitions from rail to rail. And once again the Vee coming out the tail help you pivot from rail to rail when trying to turn a little harder or re-direct the board.
Summary
Just like in every aspect with shaping surfboards, there is no set way to take when approaching the bottom.
There are endless possibilities and combinations that can be played with. Some are trusted and others might be best suited for specific style of boards.
How they play into your board’s rail, tail and nose is also important to understand. There are many variations and other types of bottom contours that we will go over later, like channels, panels, chines, etc. that all have functional purpose in their own way. They all help control the flow of water, and the drag and release that can play into how the shaper intends a surfboard to perform.
By understanding more about surfboard design, you can make a more informed decision about your next board.Mick Fanning Retires
What does retirement look like for Mick Fanning? Well, for an athlete of his stature, initially attention, and lots of it! Follow Mick around for a full day of back to back interviews and media obligations.
Mick has announced his retirement from competitive surfing after the Bells Rip Curl Pro 2018, an event that means a lot to him. Although Mick will be missing from the locker rooms and podiums around the globe, he won’t be disappearing any time soon. With cinematic projects in the pipeline, Balter beers at your local pub plus partnerships with Creatures of Leisure, DHD Surfboards and FCS Fins, we will always be surrounded by Mick Fanning’s presence in one way or another.


